Create a Timeline Component with C++ in Unreal Engine 5
Timelines are extremely useful throughout game development and provide a lot of utility in Unreal.
Game Engine
Unreal Engine 5.4.4
IDE
Rider 2024.2.7
Project Name
MyProject
Timelines can be very useful throughout game development for a variety of features. Getting started with Timelines with C++ in Unreal can be challenging at first due to it's unique feature set, so without further ado, get started.
Create a new actor, I called my MyTimelineActor
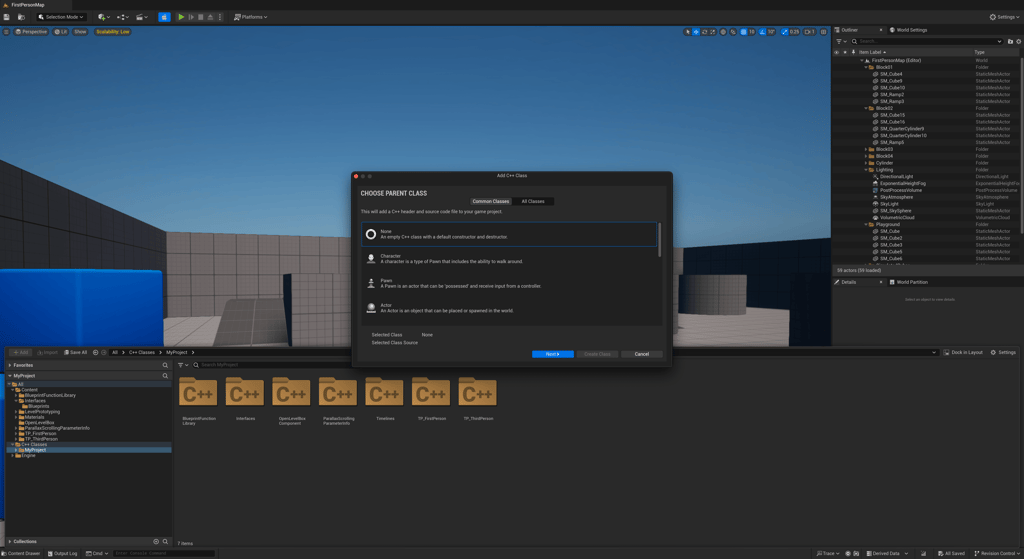
In this example we'll be making a moving platform so we'll need to declare a few properties and a function.
StartLocationactor's start location, typeFVectorEndLocationactor's end location, typeFVectorMyTimelinethe timeline component, typeUTimelineComponentAlphaCurvethe float curve we will assign to the timeline, typeUCurveFloat. The float curve will be made inside the editor.Updatethe function that will trigger when the timeline is running
MyTimelineActor.h
#pragma once

#include "CoreMinimal.h"
#include "GameFramework/Actor.h"
#include "MyTimelineActor.generated.h"

class UCurveFloat;
class UTimelineComponent;

UCLASS()
class MYPROJECT_API AMyTimelineActor : public AActor
{
	GENERATED_BODY()

public:
	// Sets default values for this actor's properties
	AMyTimelineActor();

protected:
	// Called when the game starts or when spawned
	virtual void BeginPlay() override;

public:
	UPROPERTY(EditAnywhere)
	FVector StartLocation;

	UPROPERTY(EditAnywhere)
	FVector EndLocation;

	UPROPERTY(EditAnywhere)
	UCurveFloat* AlphaCurve;

	UPROPERTY(EditAnywhere)
	UTimelineComponent* MyTimeline;

	UFUNCTION()
	void Update(float Value);
};
In the .cpp file we create the UTimelineComponent inside the actor's constructor function.
...
AMyTimelineActor::AMyTimelineActor()
{
	MyTimeline = CreateDefaultSubobject<UTimelineComponent>(TEXT("MyTimeline"));
}
...
Then inside BeginPlay is where most the logic happens. First we bind the Update function to a FOnTimelineFloat function so we add it to the timeline component. We then configure the UTimelineComponent by applying the AlphaCurve along with setting it's interpretation function. In this example I set the looping value to true because I want the platforms to ping back and forth. Then finally, we play the timeline with MyTimeline->PlayFromStart();
{
	Super::BeginPlay();

	StartLocation = GetActorLocation();

	if (AlphaCurve != nullptr)
	{
		FOnTimelineFloat InterpFunc;

		InterpFunc.BindUFunction(this, FName("Update"));

		MyTimeline->AddInterpFloat(AlphaCurve, InterpFunc, FName("Alpha"), FName("Alpha"));
		MyTimeline->SetLooping(true);

		MyTimeline->PlayFromStart();
	}
}
The `Update function is very simple, it lerps from one location to another and sets the actor's new location to the lerp result.
void AMyTimelineActor::Update(float Value)
{
	FVector NewLocation = FMath::Lerp(StartLocation, EndLocation, Value);
	SetActorLocation(NewLocation);
}
MyActorTimeline.cpp
#include "MyTimelineActor.h"
#include "Components/TimelineComponent.h"
#include "Curves/CurveFloat.h"

// Sets default values
AMyTimelineActor::AMyTimelineActor()
{
	MyTimeline = CreateDefaultSubobject<UTimelineComponent>(TEXT("MyTimeline"));
}

// Called when the game starts or when spawned
void AMyTimelineActor::BeginPlay()
{
	Super::BeginPlay();

	StartLocation = GetActorLocation();

	if (AlphaCurve != nullptr)
	{
		FOnTimelineFloat InterpFunc;

		InterpFunc.BindUFunction(this, FName("Update"));

		MyTimeline->AddInterpFloat(AlphaCurve, InterpFunc, FName("Alpha"), FName("Alpha"));
		MyTimeline->SetLooping(true);

		MyTimeline->PlayFromStart();
	}
}

void AMyTimelineActor::Update(float Value)
{
	FVector NewLocation = FMath::Lerp(StartLocation, EndLocation, Value);
	SetActorLocation(NewLocation);
}
Now we can go into the editor. First we'll need to create the float curve.
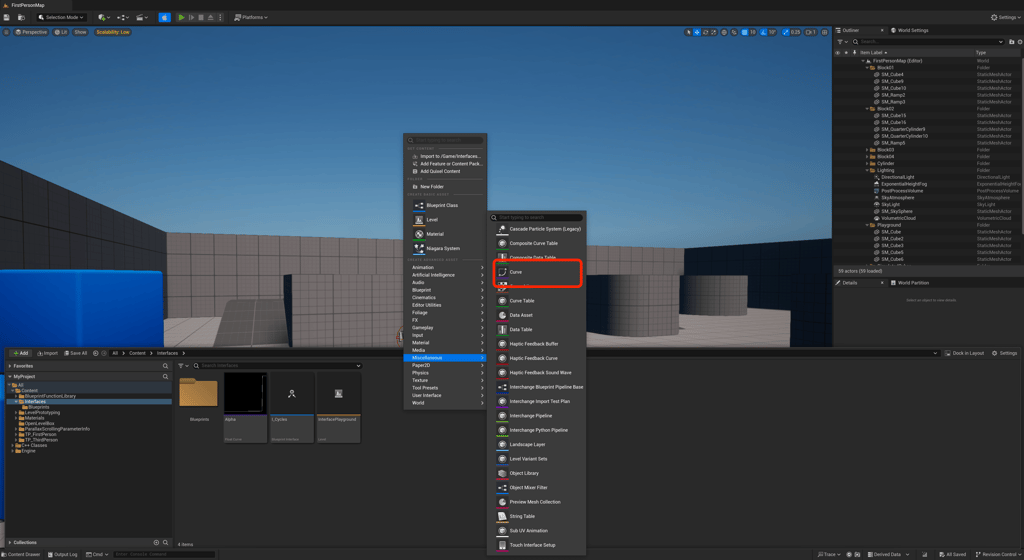
This curve value will be plugged into FMath::Lerp that needs an alpha value ranging from zero to one. I also want the value to return zero so it loop effectively. I create three keys to the float curve.
- Key 1: 0, 0
- Key 2: 5.0, 1.0
- Key 3: 0, 0
And then I selected all keys, right clicked, and set them to auto to have a smooth transition between points.

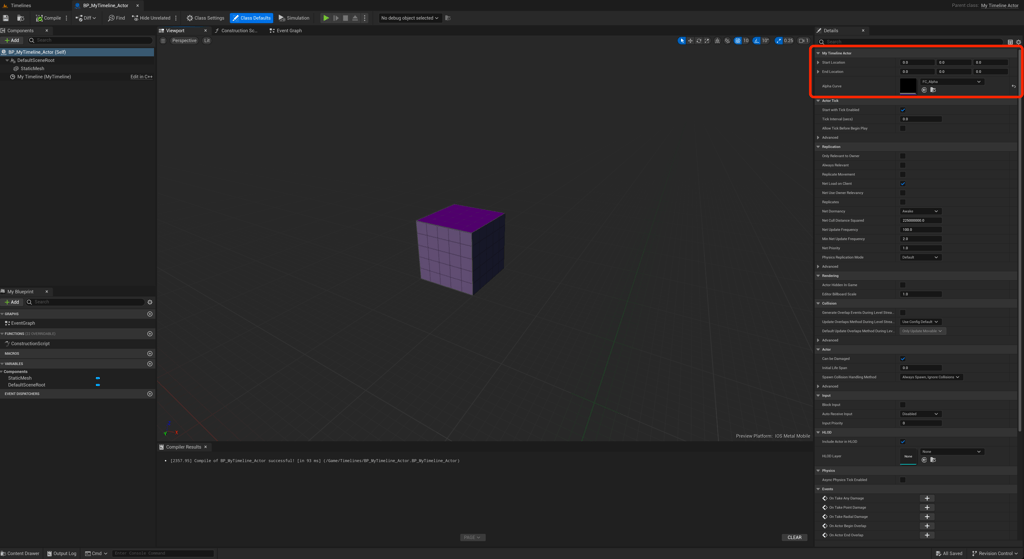
With our work done we can now create a Blueprint and start building our level.
I created a new Blueprint called My_Timeline_Actor and added a static mesh component along with setting the AlphaCurve variable with our newly created float curve.
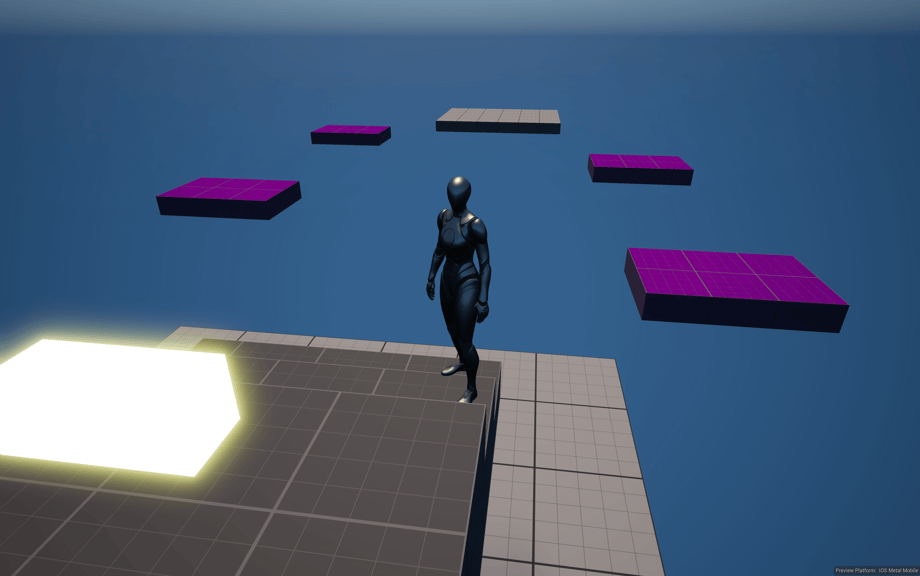
Finally, we can drag the Blueprint into world and set the starting and ending locations of the platforms. Below the final result, there are four moving platforms and a piece of gold at the end to collect.
Overall, making a moving platform doesn't take a lot of code, it just has to be configured correctly.

Harrison McGuire